
Recreating Corcel UnCrop with Corcel's Inpaint API
My favorite Corcel application is the uncrop function.
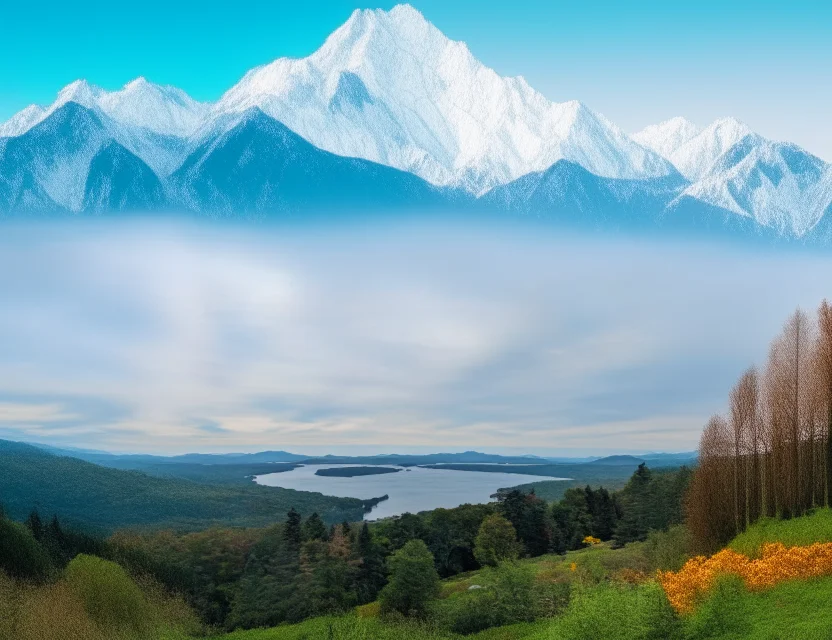
This dramatic image:

has roots in a real image taken in the mountains of Maine:
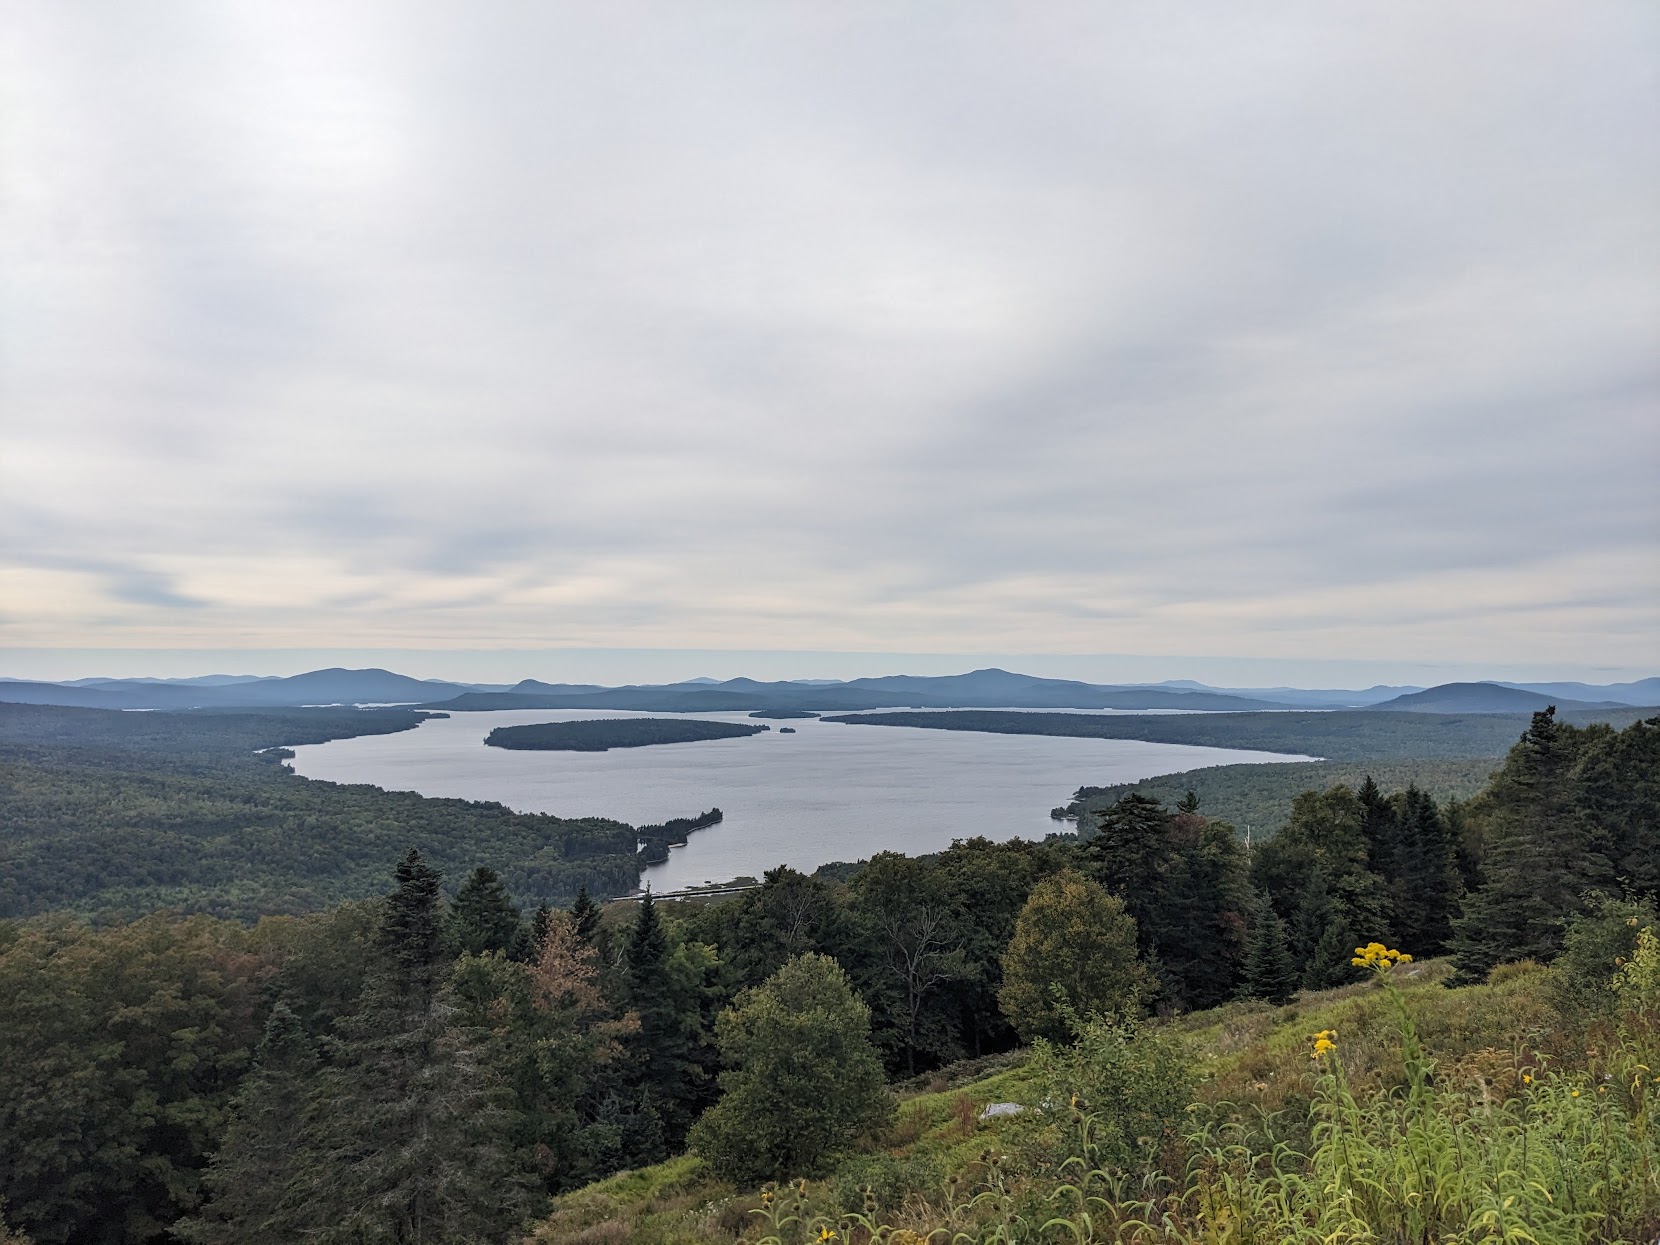
Pretty cool stuff - some of the trees and flowers are from a real image, but the AI has augmented the image to a dramatic effect - adding trees and mountains to the scene.
No Uncrop API
If you want to build a similar feature for your own application, you will notice that we do not offer an uncrop API endpoint. Never fear! We will use the Vision: Inpaint endpoint to build an application very similar to the uncrop feature.
The Inpaint API uses two images, the photo to be modified, and a mask. The mask image must have the same dimensions as the photo and will be 2 colors - white where new content will be added, and black where the image will not be modified.
Here is the starting image we will use (created with the Scribble endpoint):
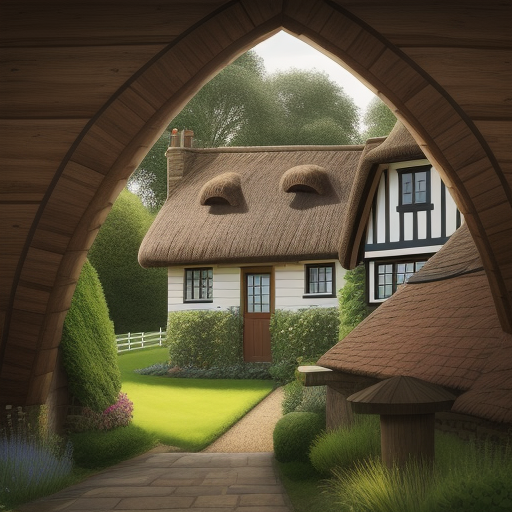
What I would like to do is extend the foreground of this image to show the inside of the building. I have imagined that this is the view from a horse stable next to the thatched cottage. To do this with the Uncrop app, I place the image, add a prompt, and click:
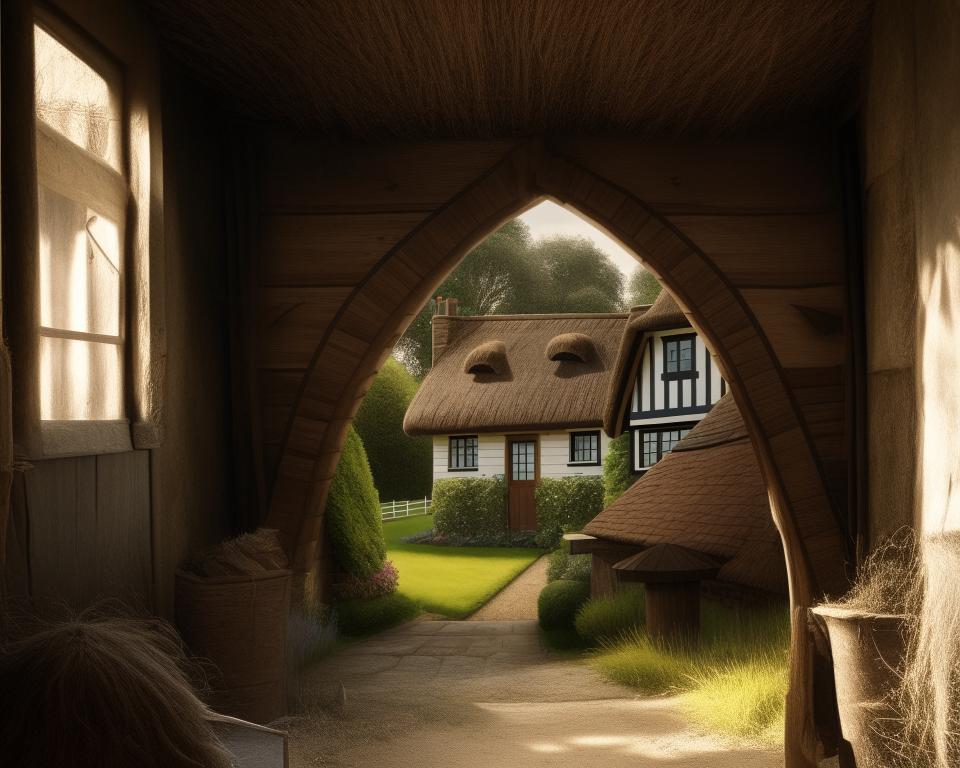
Amazing!
Via the API
Now, let's recreate the Uncrop feature with the inpaint API.
You'll need a Free API Key to access the inpaint API.
Using Python we will read in the thatch.png image. This image is 512x512 pixels. We will create a new image with a white background that is 1024x1024, and then place our image in the center of the white image. We will then create a 1024x1024 mask - where we have a black rectangle (512x512) replacing the image. (This is a simplified version of uncrop - the image is always centered. With some code tweaks, this can be modified.)
The inpaint API requires that the images be base64 encoded, so we can complete that step at the same time we create the images. Our Python code to complete these steps appears as follows:
from PIL import Image
import matplotlib.pyplot as plt
import io, base64

# Open the original image
original_image = Image.open('thatch.png')

# Define the new size and the color of the background
new_size = (1024, 1024)
background_color = 'white'

# Create a new image with the specified size and background color
new_image = Image.new("RGB", new_size, background_color)

# Calculate the position to paste the original image on the new image
# so that it is centered
left = (new_size[0] - original_image.size[0]) // 2
top = (new_size[1] - original_image.size[1]) // 2
right = left + original_image.size[0]
bottom = top + original_image.size[1]

# Paste the original image onto the new image
new_image.paste(original_image, (left, top, right, bottom))

# Display the image
plt.imshow(new_image)
plt.axis('off')  # Hide the axis
plt.show()

# Save the new image with the resized canvas
new_image.save('resized_image_with_white_background.png')
# Save the image to a bytes buffer instead of a file
buffered = io.BytesIO()
new_image.save(buffered, format="PNG")

# Convert the bytes buffer to a base64 string
new_image_str = base64.b64encode(buffered.getvalue()).decode()

# create the mask
# Create a new image for the mask with a white background
mask = Image.new("RGB", new_size, "white")

# Create a black rectangle for the original image size
black_rectangle = Image.new("RGB", original_image.size, "black")

# Calculate the position to paste the black rectangle on the mask
# so that it is centered
left = (new_size[0] - original_image.size[0]) // 2
top = (new_size[1] - original_image.size[1]) // 2

# Paste the black rectangle onto the mask
mask.paste(black_rectangle, (left, top))
# Display the image
plt.imshow(mask)
plt.axis('off')  # Hide the axis
plt.show()
# Save the mask
# Save the mask to a bytes buffer instead of a file
buffered = io.BytesIO()
mask.save(buffered, format="PNG")

# Convert the bytes buffer to a base64 string
mask_str = base64.b64encode(buffered.getvalue()).decode()
The Jupyter Notebook will display the two images once this cell is executed.
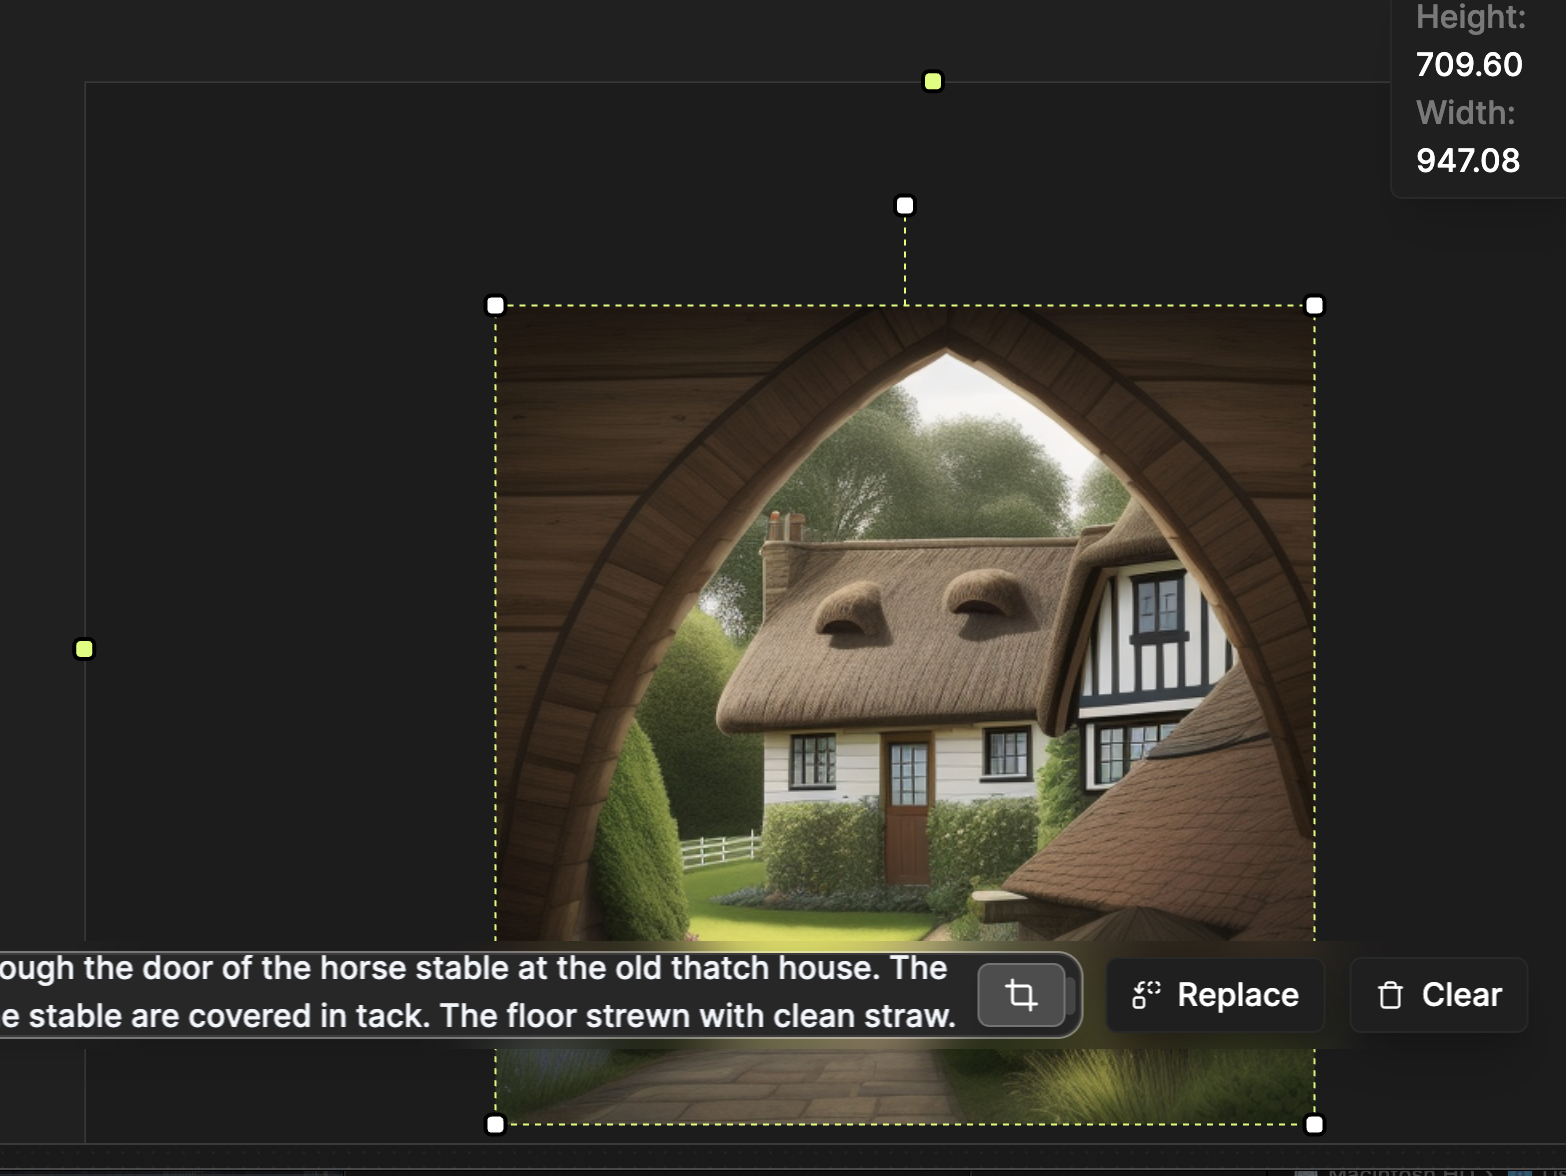
In the 2nd cell of the Jupyter Notebook, we invoke the Inpaint API. Make sure to replace <apikey> with your API key "Authorization": "123-456-789". The prompt is defined as a variable, and the two images are passed in from the first code snippet
import requests,json
from io import BytesIO

url = "https://api.corcel.io/v1/image/vision/inpaint"
prompt="A view through the door of the horse stable at the old thatch house. The walls of the stable are covered in tack. The floor strewn with clean straw."

payload = {
    "cfg_scale": 4,
    "steps": 25,
    "engine": "kandinsky-2.2",
    "init_image": new_image_str,
    "mask_image": mask_str,
    "text_prompts": [{ "text": prompt }]
}
headers = {
    "accept": "application/json",
    "content-type": "application/json",
    "Authorization": "<apikey>"
}

response = requests.post(url, json=payload, headers=headers)

responseJSON = json.loads(response.text)
#print(response.text)
image_url = responseJSON['signed_urls'][0]

#print the URL
print(image_url)

#download the image and display it in the notebook
response_img = requests.get(image_url)
img = Image.open(BytesIO(response_img.content))

# Display the image
plt.imshow(img)
plt.axis('off')  # Hide the axis
plt.show()
When this code is executed, the image is displayed in the Jupyter Notebook:
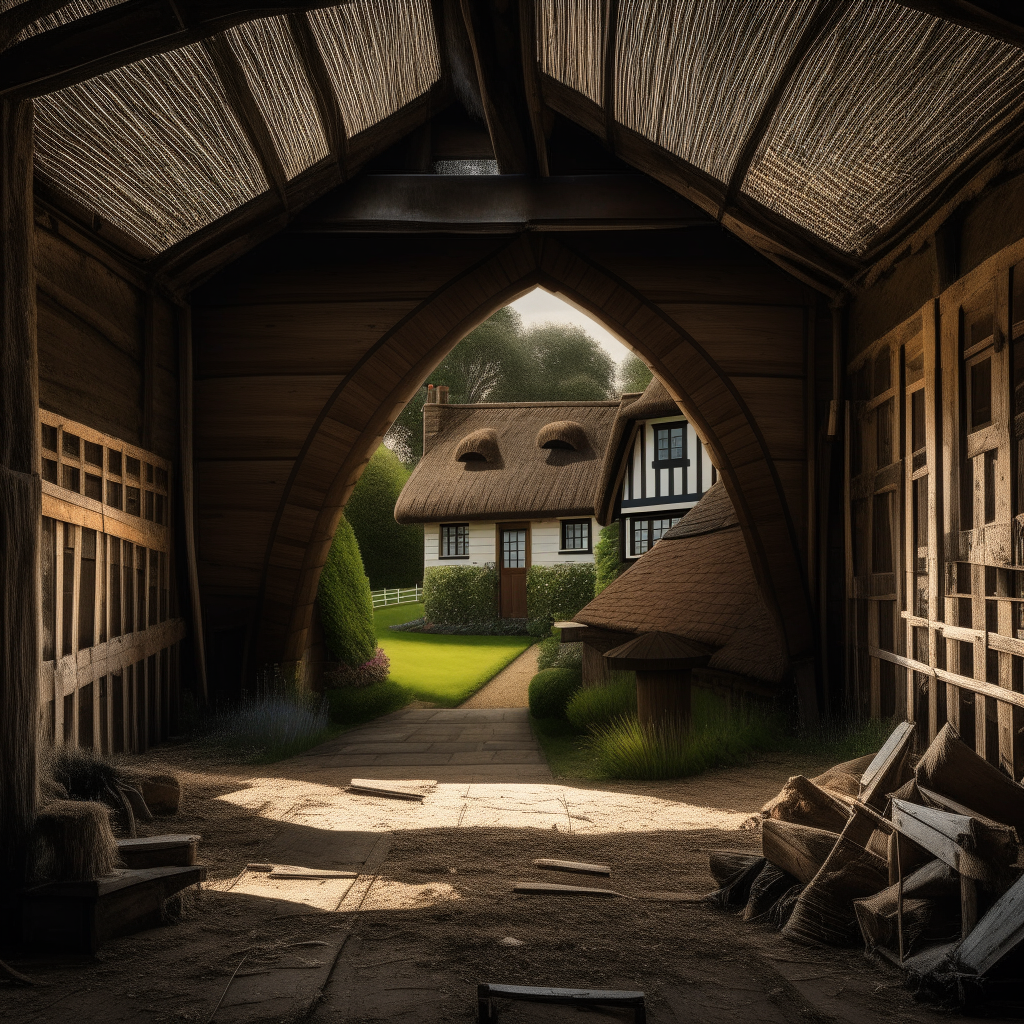
By tweaking the cfg_scale higher, I was able to create a more imaginative interior. I love that the ceiling is what I imagine a thatch roof might look like from the inside.
Summary
In this tutorial, we used the Corcel Inpaint API endpoint to recreate the uncrop feature from Corcel Studio. We encourage you to try ways to develop new applications and products with our APIs and share them in our Community Discord
Updated 5 months ago